Recently, Kim Ryan and Chris Jones presented an Introduction to Workflow to the Upstate SC SharePoint user group. In their presentation, they went over the setup of the new Workflow farm and demonstrated both the added and removed features.
What do you need to begin?
To start, you need to have Workflow 2013 farm running and connected to SharePoint. Spencer Harbar has one of the best walkthroughs that covers a more complex scenario than the MSDN walkthrough. Without a workflow farm, you will still be able to create workflows with SharePoint Designer, but you will be limited to 2010 style workflows.
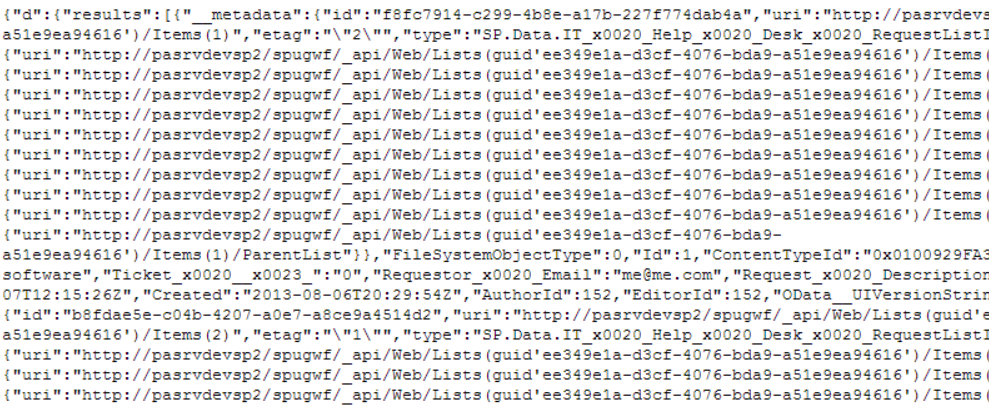
Next, go ahead and grab a copy of ModHeader or equivalent plug-in to your favorite browser. This will enable you to change the Request Headers you send to SharePoint and get back JSON results from REST services instead of XML.
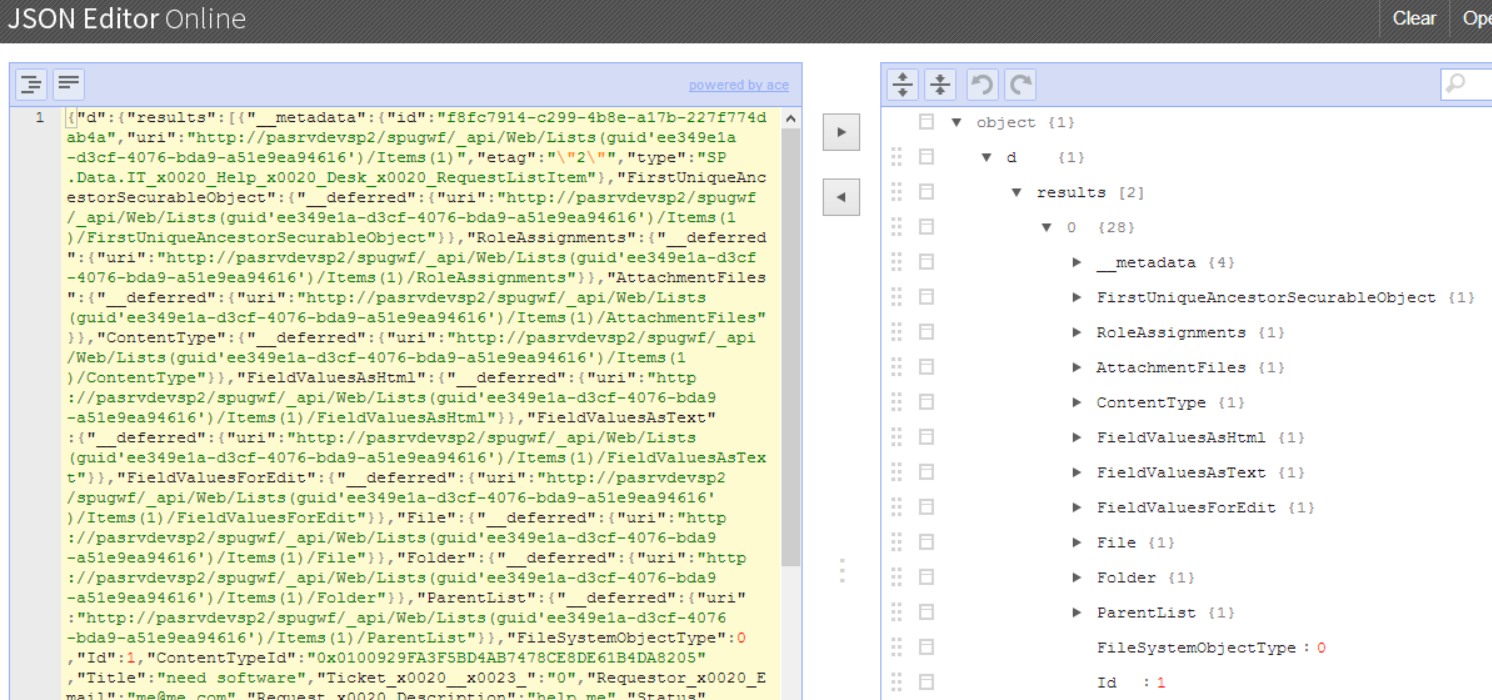
To make parsing the JSON results easier, either download a JSON parser or head on over to an online JSON parser like http://www.jsoneditoronline.org/. This site has an input field for raw JSON and a tree interface for navigating the resulting hierarchy. All you need to do is paste the results of your call to the REST service into the input on the left. Then, press the right arrow button to see the data on the right. This makes it much easier to navigate down the hierarchy to determine what selectors you will need to enter to get the right data out of your dictionaries. Disclaimer: Keep in mind that you are sending data to a third party online system to do this transfer. If you don’t think that someone should be reading the data you are sending, your best bet would be to look for an alternate tool.
The SharePoint 2013 REST Interface describes itself in many of the results, but it helps to have a good reference to know what you can do with it. MSDN has a number of REST articles for 2013. Get Started with the SharePoint 2013 REST service is coincidently a great starting point. In addition, MSDN Magazine had a great article that helps with some advanced filtering, selecting, and sorting options that we used in our example.
Finally, the last tool we need is SharePoint Designer 2013. On to the example.
Requirements
For our example, we are going to demonstrate setting up a Site Workflow that monitors a list for open IT Help Desk tickets and sends out a daily summary of open tickets.
Step 1 – Call the REST Service
The Call HTTP Web Service activity is one of the best new activities for Workflow in 2013 is. This activity accepts a URL and Request headers and returns with a Dictionary results object, Response Headers and Response Code.
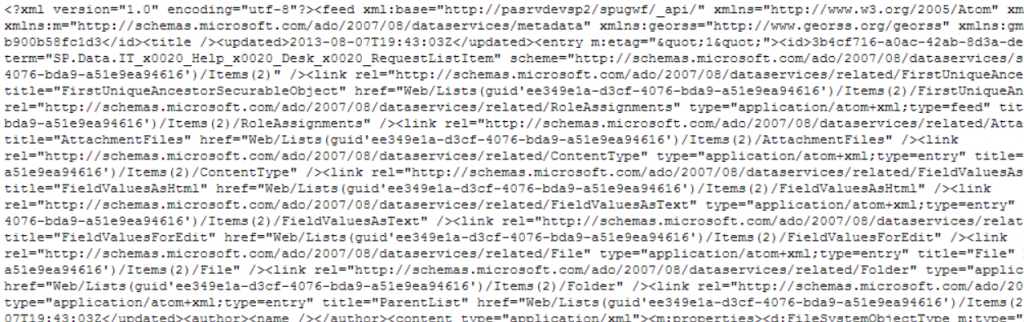
In our case, we will have a static URL to pull all the open tickets from one list, the IT Help Desk list. The REST call to receive all our items is http://<servername>/<siteurl>/_api/web/Lists/getbytitle(‘IT%20Help%20Desk%20Request’)/items. Since we only want to receive the items whose Status is Open, we need to add a filter. The MSDN Magazine article noted above gave us enough information to accomplish this. By changing the URL to http://<servername>/<siteurl>/_api/web/Lists/getbytitle(‘IT%20Help%20Desk%20Request’)/items?$filter=Status eq ‘Open’, we are able to only get back the list of IT Help Desk Requests that are currently in open state.
Next, we need to change our headers so that SharePoint will respond with JSON. To do this, we put a Build Dictionary activity prior to the Call HTTP Web Service.
![]()
Next, we set our Dictionary values.
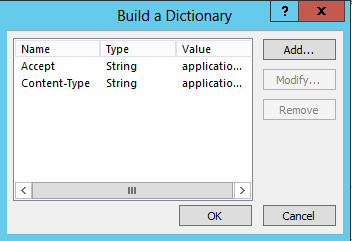
The values for both Accept and Content-Type are both: application/json;odata=verbose. This is the exact same thing you would enter into ModHeader in order to change the results to JSON for testing.
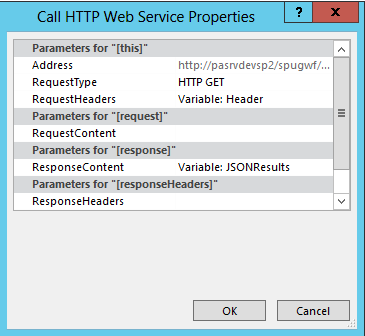
Setting the Request headers is a bit tricky. Go to the drop down for the activity, select properties, and enter the Header variable you created in the previous activity into the RequestHeaders parameter.
The last step of the Call HTTP Web Service activity is to set the dictionary variable. In production code, you’ll want to validate the Response Headers and Code, but what we are really after in this example is the dictionary value.
Step 2 – Setup the Loop
The next step is quick. We need to setup our loop so that we go through all the items in the dictionary. As with the examples above, the children of the d/Results item are our returned items. This means if we do a count on d/Results children, then we will know how many times to go through the loop.

Finally, we set an Index variable just like you would in any other programming language and loop until we are equal to the number of items returned from the call.

Step 3 – Getting the values of each item
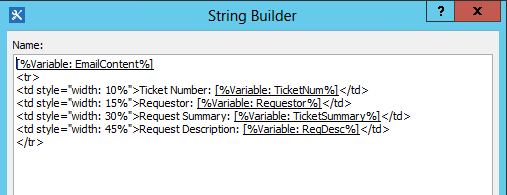
Our requirement is to build a summary of all the open IT Help Desk items. To do that we are going to pull out the Ticket Number, Title, and Description from each item and build the body of the email with those values.
First, we need to get a reference to the item at the index position for each round in the loop. To do this, we’ll use the Get an Item from a Dictionary activity and use the selector d/results([%Variable:index%]) where index is the workflow variable that we are using for loop control.
![]()
The result in this case is another Dictionary object, so we will then make 4 calls using the same activity with ResultItem being the source dictionary this time.
![]()
Finally, we will build our email body using a string builder and referencing our resultant string at the beginning to append each item summary.

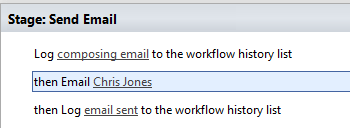
Step 4 – Send Email
Using the Email activity, we’ll append some header and footer information to the email body we built up and Email it to our recipient.
Conclusion
This is just a small taste of the possibilities now available to SharePoint Designer workflows in SharePoint 2013. With the REST API improved for SharePoint 2013, numerous operations are now at the disposal of power users to create much more complex workflows that are still easy to read and aren’t jumping through quite as many hurdles as previous versions.